This post was written by BIM Corner’s Guest Authors: Agata Firlej and Anna Łukasik.
Importing Geographic Information System (GIS) data unlocks new possibilities for designers: it enables them to base models on real-world geographic context, analyze site conditions, and integrate spatial data into parametric design workflows. This functionality proves particularly valuable in urban planning or infrastructure projects.
Grasshopper as a powerful visual programming plugin for Rhino 3D allows designers and engineers to create complex 3D models using algorithmic techniques. One useful feature of Grasshopper is the ability to import and visualize GIS data. Information about buildings, roads, terrain, and other geographic features are commonly stored with a usage of shapefile format.
About .shp
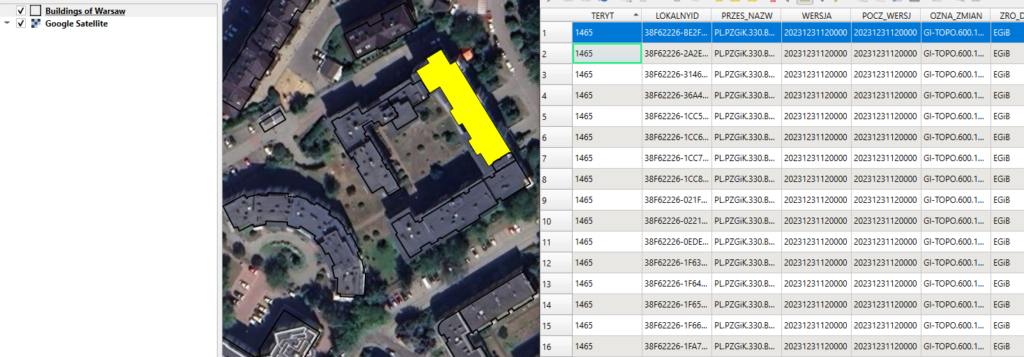
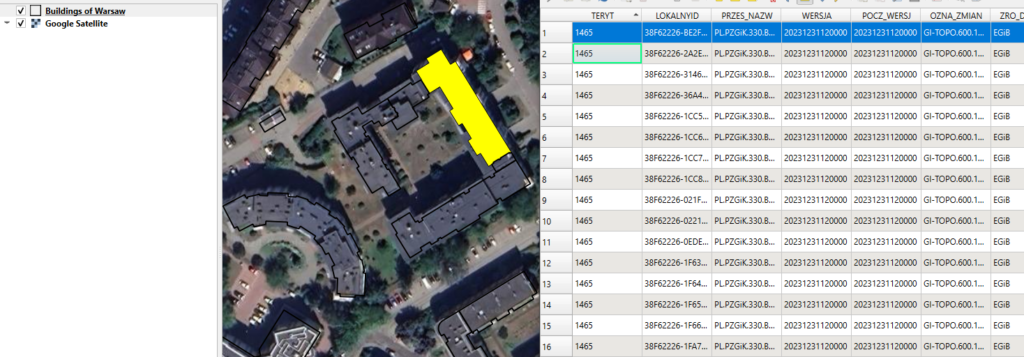
SHP, referres to a shapefile. It is a popular geospatial vector data format used by geographic information systems software. What makes shp outstanding, it embodies a dual nature of spatial data: geometry and attributes. In GIS geometry refers to representation (locations, shapes, and relationships) of existing or conceptual objects on the Earth’s surface.
Complementing the geometric information is the attribute data, which provides additional context and detail about the spatial features. Stored in a tabular format, include descriptive information such as names, classifications, or numerical values associated with each geographic object. Due to the variety of data type stored, .shp files do not function as a single file but as a set with the same base name but different extensions. Separating data into different files allows for more efficient management and access. Each package contains the following mandatory components:
- .shp: The main file that stores the geometry (shape) data.
- .dbf: The attribute data file that stores feature attributes in a tabular format.
- .shx: The shape index file that stores the index of the geometry.
Another important feature of shapefiles is ability to store information regarding coordinate reference system (CRS), which defines how the two-dimensional map corresponds to real-world locations. The CRS information is typically stored in an .prj file. If the CRS is missing or incorrect, spatial data might be displayed in the wrong location or appear distorted. Therefore, assigning the correct coordinate system to .shp files is crucial for their proper use.
How to read shp files?
There is variety of free (Qgis, Google Earth Pro) and commercial (ArcGis Pro, AutoCAD Map 3d, Bentley Map Extension for Microstation) softwares that allow user to open and manipulate shp files. Grasshopper, combined with plugins can import and visualize this GIS data directly within the Rhino 3D environment.
The process typically involves the following steps:
- Obtain GIS Data: First, you need to acquire the relevant GIS data for your project area, usually in the form of shapefiles. It is best to download files from trusted sources that ensure the accuracy and reliability of the data.
- Install relevant plugin: Grasshopper does not natively support GIS data, so you need to install a third-party plugin, which provide components for reading shapefiles.
- Set File Paths: In the Grasshopper environment, use the File Path component to specify the location of the shapefile you want to import.
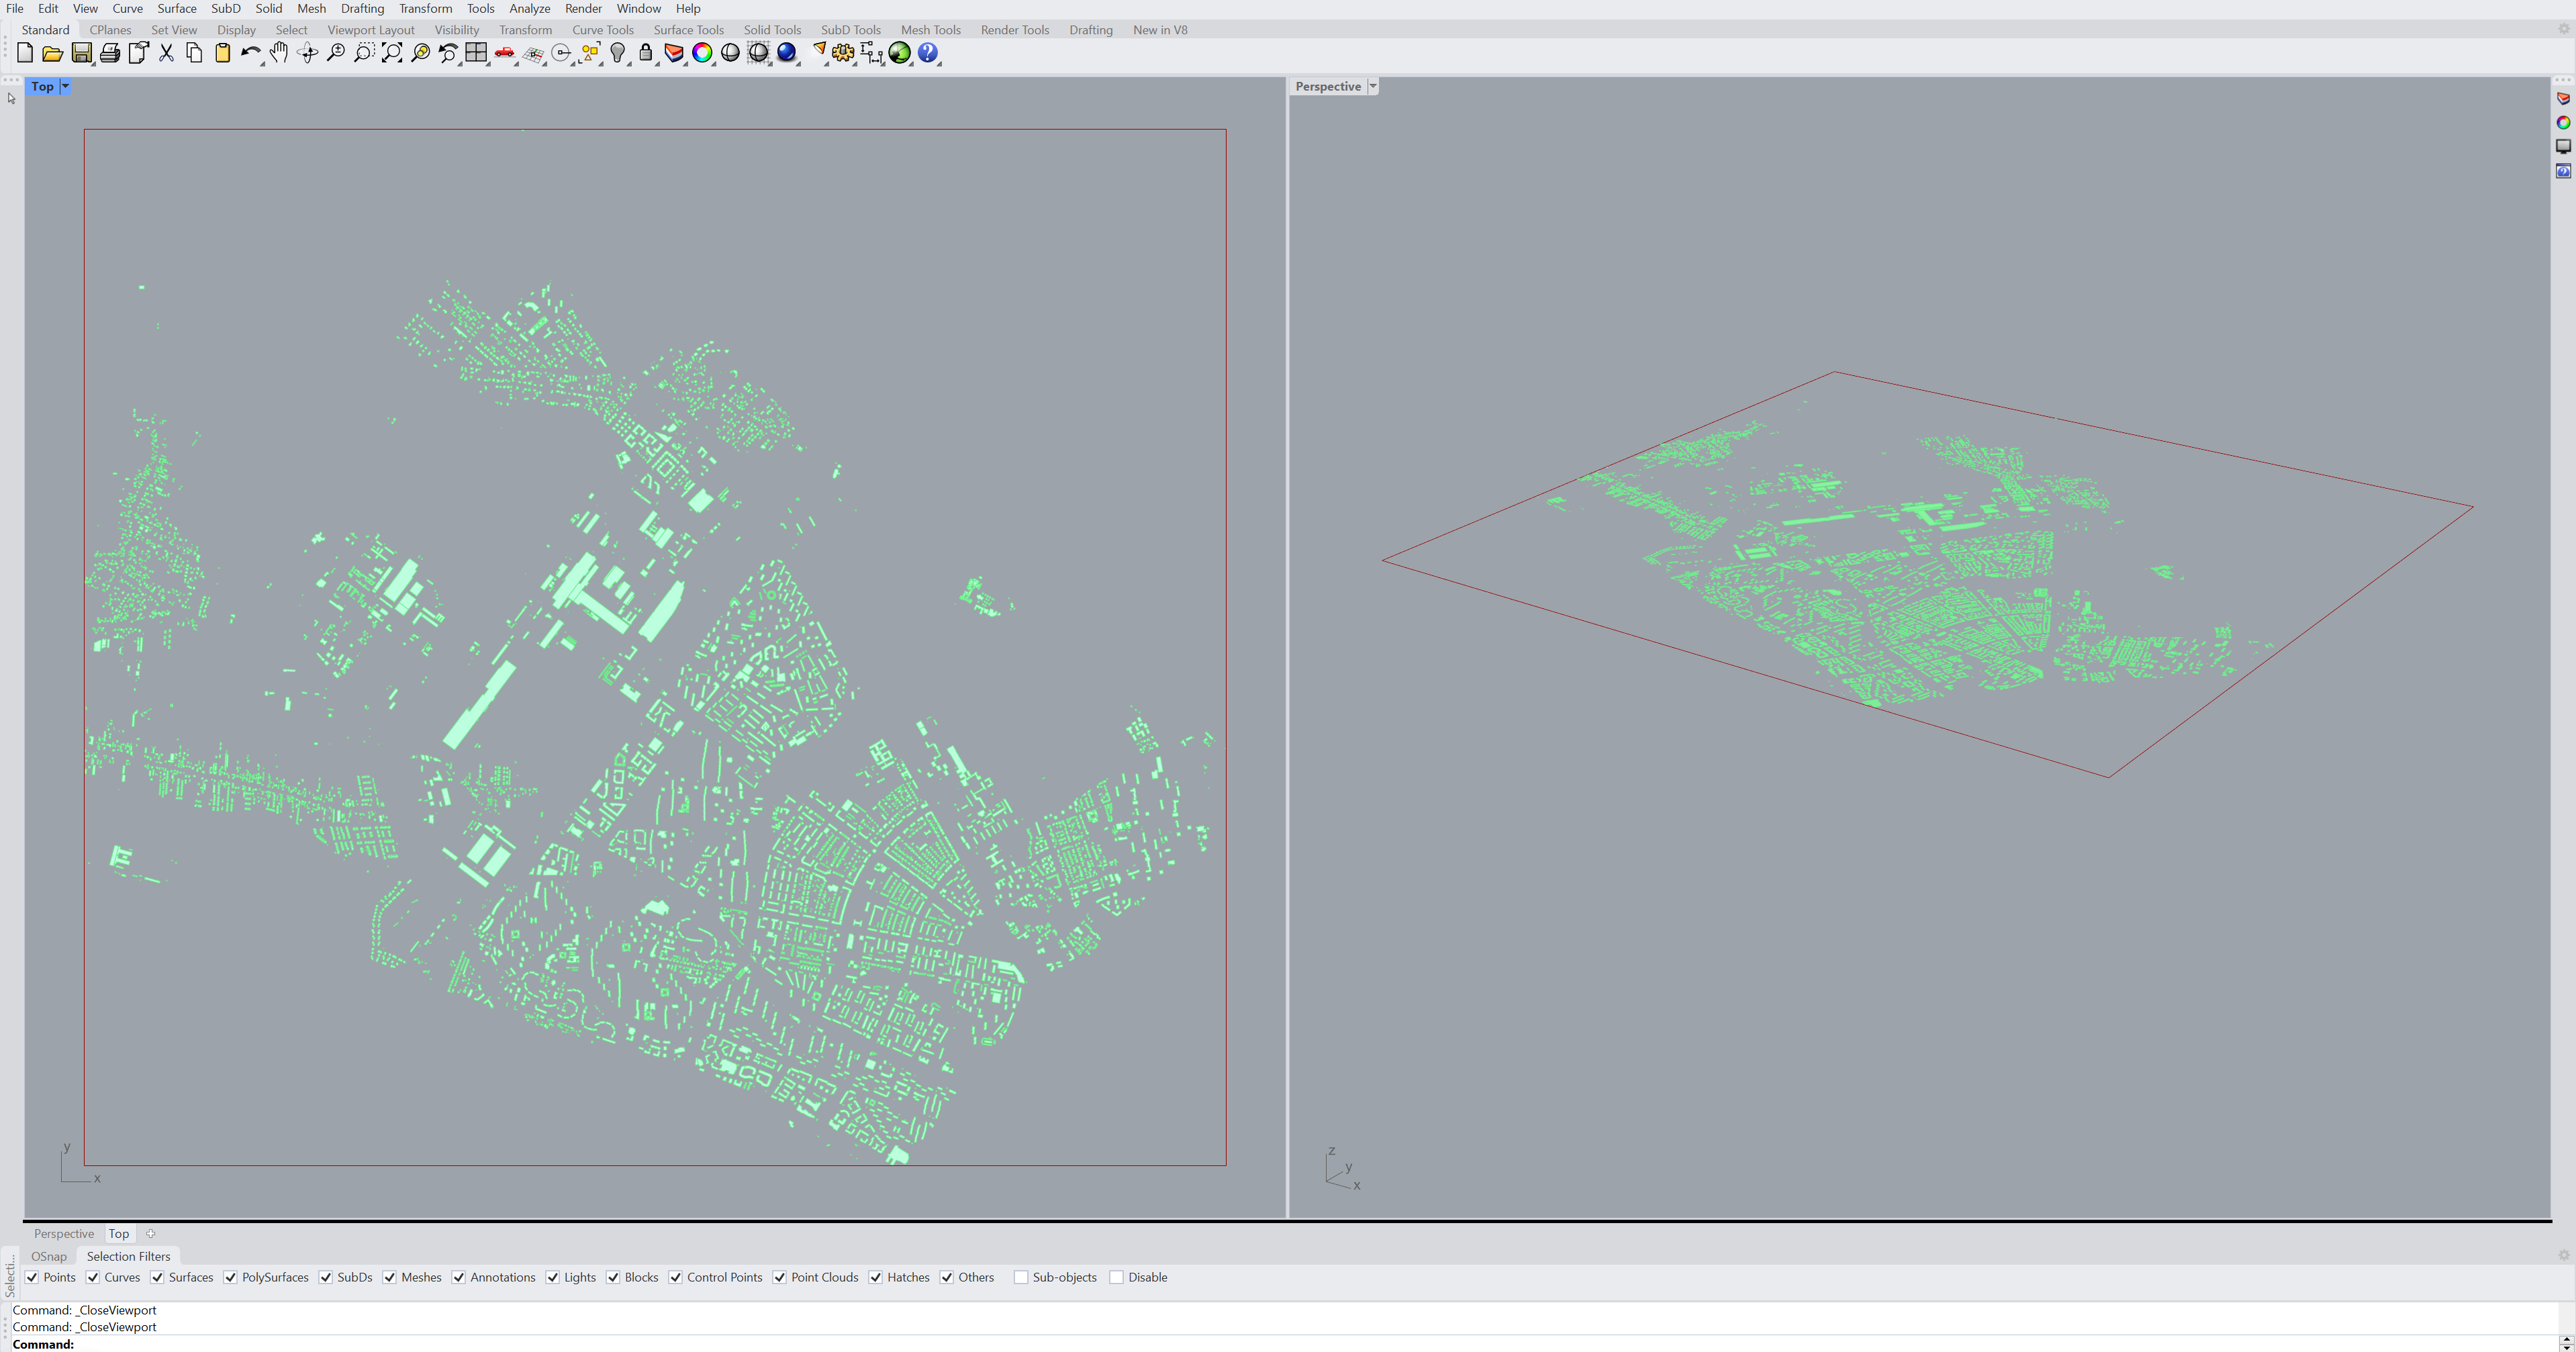
- Import Shapefile: Using the appropriate component, data in SHP format is imported into Grasshopper. Depending on the GIS input, these can include points, lines, or polylines representing geographic features. The imported GIS data can then be visualized in the Rhino viewport to be used as input for further design processes.
- Process Data: Depending on the plugin, there may be additional components to extract attribute data, reproject coordinates, or perform spatial analysis on the imported GIS data.
- Visualize in 3D: The imported GIS data can then be visualized in the Rhino viewport to be used as input for further design processes.
Power of Heron plugin
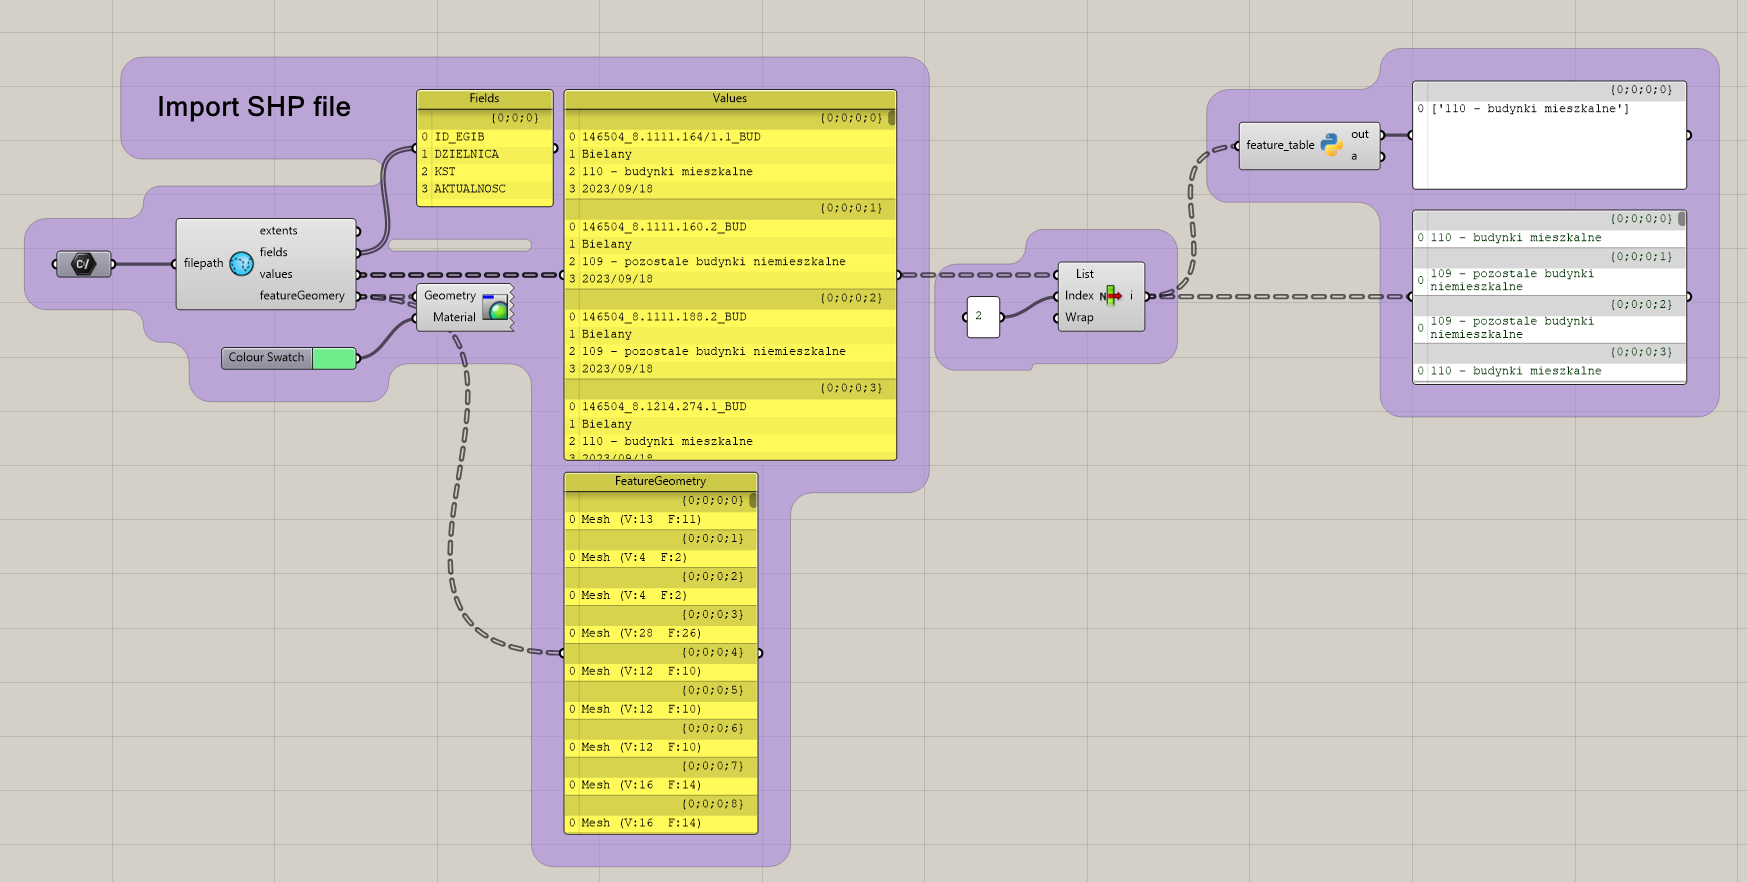
One of the plugins suitable for such tasks is Heron, which enables importing GIS data into the Grasshopper environment. The plugin provides components for importing and exporting data in various formats, including SHP files (via the Import Vector component). The SHP file contains features (in the presented example, these are buildings) along with their associated attributes. The imported data is visually represented by polylines. These data are organized into specific for the Grasshopper lists and tree structure, which play a crucial role in storing and manipulating the data.
The attribute table typical of the SHP format is divided into separate outputs from the component. However, it is possible to access both the attribute names (fields) and their specific values.
Manipulating and operating on the data is possible through other Heron components and Python scripts. Heron plugin allows user to import data in its correct geographic location as defined by the coordinate reference system (CRS) specified in the shapefile.
End
Importing GIS data into Grasshopper opens up powerful new possibilities for the designers. Once the GIS data is imported, Grasshopper’s visual programming interface enables designers to analyze, manipulate, and parametrically generate new solutions for conceptual design. As GIS data becomes more widely available and new tools are developed, the integration of geographic information systems with 3D modeling software like Rhino and Grasshopper will only become more essential for creating design solutions.

Agata FirlejAuthor of the article

Anna LukasikAuthor of the article
The post The Engineer’s Toolkit: Importing and Visualizing GIS Data in Grasshopper appeared first on Bim Corner.
About The Author
FIXEDD
FIXEDD began as a personal website with a focus on construction topics. As it evolves, FIXEDD aims to become a valuable resource for AEC professionals, providing current industry news, software updates, and expert advice. With a vision to grow and make an impact.


